
You’ve done the hard work. You’ve created amazing content, built an audience, and finally reached the Google AdSense payment threshold. But just as you’re ready to see the rewards, you hit a wall that’s all too familiar to creators in the UAE: the address verification PIN. You wait for weeks, checking your mail, only to be met with an empty PO Box and a growing sense of frustration. That little white mailer from Google, your key to getting paid, seems lost in transit. AdSense verification UAE problems.
If this sounds like your story, you are not alone. This isn’t just a simple delay; it’s a systemic challenge unique to our region. But the cycle of requesting new PINs and worrying about your ad revenue being paused ends today.
Welcome to the Definitive UAE AdSense Verification Playbook. This is not another generic guide. This is a step-by-step, creator-focused action plan designed specifically to solve the AdSense verification problem in the United Arab Emirates. We will break down why this happens, provide the exact address format that works, walk you through troubleshooting, and reveal the final manual verification solution that guarantees you get your account verified and your payments unlocked.
Why AdSense Verification is a Unique Challenge in the UAE
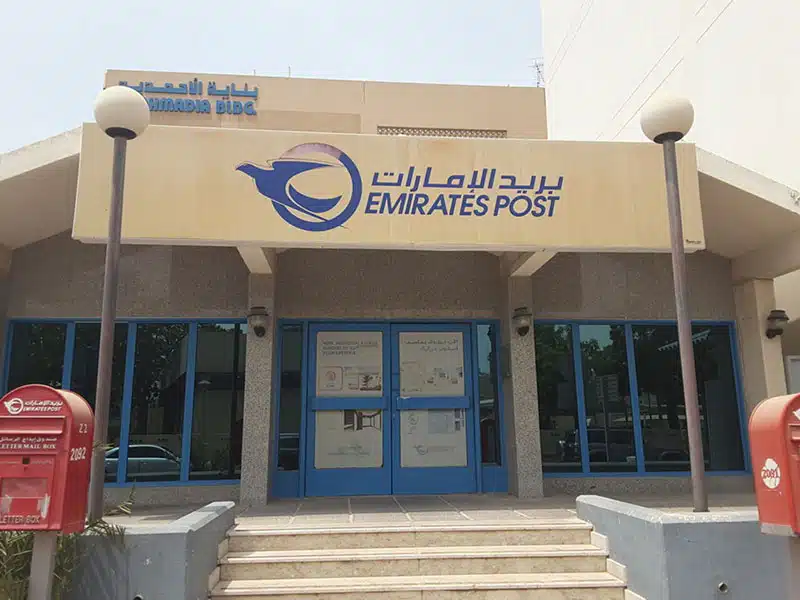
The core of the problem lies in a fundamental mismatch: Google’s automated, global standard mailing system is designed for countries with traditional street addresses and postal codes. The United Arab Emirates, however, operates almost exclusively on a PO Box-based postal system managed by Emirates Post.
When you enter a villa number or building name into AdSense, Google’s system sends the PIN via international standard mail. That mailer arrives in the UAE, but without a PO Box number, Emirates Post often has no clear destination for it. This is why so many PINs simply never arrive, creating a frustrating loop for content creators.
As the official postal service, Emirates Post makes it clear that for successful mail delivery in the UAE, the PO Box number is the most critical component of any address. Understanding and working with this local system, rather than against it, is the absolute key to solving the AdSense PIN not arriving issue. For anyone needing to learn more about the local system, the official PO Box Services | Emirates Post page is an invaluable resource.
For a complete practical guide to life in the Emirates, explore our full Living in the UAE hub.
The Official AdSense PIN Verification Process: A Step-by-Step Walkthrough
Before we dive into the UAE-specific solution, it’s essential to understand the standard process Google has in place. This provides the foundation for our troubleshooting steps later.
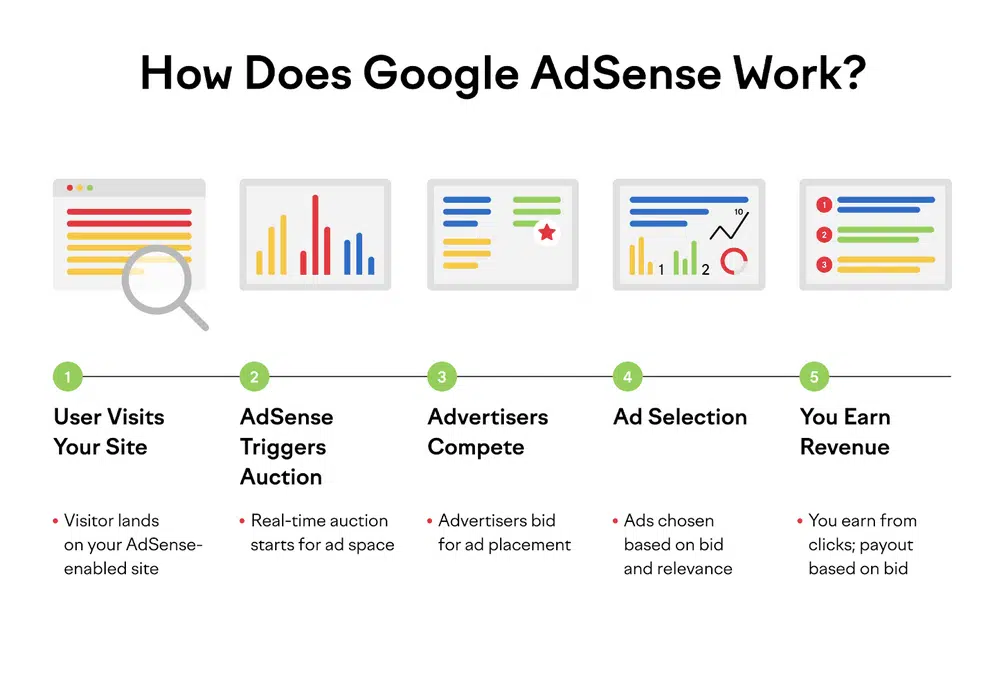
According to Google’s official AdSense Help Center, the process begins automatically. Here’s the standard timeline:
- Reach the Verification Threshold: Once your AdSense earnings reach a specific amount (typically $10 or its equivalent in AED), Google automatically generates and mails your Personal Identification Number (PIN).
- PIN is Mailed: Google sends the PIN via standard international post to the payment address listed in your AdSense account.
- Wait for Arrival: The official documentation states that the PIN “may take 2-4 weeks to arrive”. This timeline is crucial—acting too soon can reset the clock.
- Enter the PIN: Once you receive the mailer, you’ll find a 6-digit PIN inside. You must log in to your AdSense account and enter this number into the verification card on your homepage to confirm your address.
This is how the process is supposed to work. However, for creators in the UAE, the real challenge is ensuring that mailer has a deliverable address in the first place. For the official policy, you can always refer to the Address verification (PIN) overview – Google AdSense Help page.
The UAE Solution: How to Format Your Address for Guaranteed Delivery
This is the most critical section of this guide. Formatting your payment address correctly within the AdSense dashboard is the single most effective thing you can do to ensure you receive your PIN on the first try. Forget about your street address or building name; focus entirely on providing clear information for Emirates Post.
Strongly consider getting a personal PO Box from your local Emirates Post office. It costs around 300 AED for a year and is the most reliable way to receive important mail.
Here is the exact, field-by-field format you should use:
Address Line 1: Your Name and PO Box Number
This line is the most important piece of information for the postal worker. It must contain the two things they need to deliver the mail: who it’s for and where it goes.
Format: Full Name, P.O. Box 12345
Enter your full name exactly as it appears on your Emirates ID or the name registered to the PO Box. Follow it with a comma, and then your complete PO Box number. This ensures the mail is sorted correctly upon arrival in the UAE.
Address Line 2: Your Mobile Number (The Secret Weapon)
This is the expert tip that dramatically increases your success rate. While not an official requirement from Google, adding your local UAE mobile number is a powerful tool for Emirates Post. If there is any confusion or issue with your mail, a postal employee may use this number to contact you.
Format: Mobile: +971 5X XXX XXXX
This simple addition transforms your address from a static location into a contactable point, bridging the gap between international mail standards and local delivery practices. This is an experience-based tip that goes far beyond the official documentation.
City, Postal Code, and Country Fields
These final fields are straightforward but often cause confusion, especially the postal code.
- City: Enter your city (e.g., Dubai, Abu Dhabi, Sharjah).
- Postal Code: The UAE does not use a system of postal codes for street addresses. In this field, you can enter
00000or leave it blank if the system allows. Do not try to invent a postal code. - Country: Select “United Arab Emirates” from the dropdown menu.
By using this precise format, you are giving Emirates Post everything it needs to get the Google AdSense PIN directly to your PO Box without any guesswork.
Troubleshooting: What to Do When Your AdSense PIN Doesn’t Arrive
Even with the correct address format, delays can happen. If you find yourself waiting and your adsense pin not arriving, don’t panic. Follow this clear action plan.
Step 1: Wait the Full 3-4 Weeks
Patience is key. Google’s official guidance states that international mail can take 2-4 weeks, and sometimes longer depending on local postal services. Before you do anything else, you must wait at least three weeks from the date your last PIN was mailed. You can see this date in your AdSense verification card. Requesting a new PIN too early will not speed up the process.
Step 2: Double-Check and Correct Your Address
After the waiting period has passed, but before you request a replacement, your first action should be to review your payment address in AdSense.
Navigate to Payments > Payments info > Settings > Manage settings and carefully check your address against the exact format detailed in the previous section. Correct any mistakes. This ensures that when you request a new PIN, it is sent to the right, fully optimized address.
Step 3: Request a Replacement PIN
If you’ve waited at least three weeks and have corrected your address, it’s time to request a new PIN.
In your AdSense account, the verification card should now show a “Resend PIN” or “Request new PIN” button. Click it to have a new PIN mailed to the address on file. It’s important to know that this new PIN is a duplicate of the original. If your first mailer happens to arrive after you’ve requested a new one, you can still use the PIN from it—they are identical.
You can repeat this process a few times, but if you’ve failed to receive the PIN after several attempts, it’s time for the final solution.
The Final Solution: Manual Verification When All Else Fails
If you have requested the maximum number of replacement PINs and have still not received one after four months from the date your first PIN was issued, Google provides a final, manual verification method. This is the ultimate fallback that many guides miss, and it allows you to verify your address using official documents instead of the physical mailer.
Once you are eligible, you will be able to use Google’s official AdSense PIN Troubleshooter. You can access this tool here: https://support.google.com/adsense/troubleshooter/1094206.
Follow the steps in the troubleshooter. It will confirm your situation and eventually provide you with a link to a secure form where you can upload a copy of an official document. To be successful, you will need:
- A government-issued ID: A clear picture of your Emirates ID is perfect. The name on the ID must exactly match the payee name in your AdSense account.
- Proof of Address: A bank statement, utility bill (DEWA, SEWA, etc.), or telephone bill that shows your payee name and the mailing address exactly as they appear in your AdSense account.
Once you submit these documents, the AdSense team will review them, and if everything matches, they will manually verify your account. This bypasses the need for the physical PIN entirely and resolves the issue for good.
Frequently Asked Questions (FAQ)
Can I use my office or a friend’s PO Box for AdSense?
Yes, you can. However, it is critical that the payee name in your AdSense account can be received at that PO Box. If the PO Box is under a company name, you may face issues. The safest option is to have the AdSense payee name match the name registered to the PO Box or ensure the person who owns the PO Box can receive mail on your behalf.
How many times can I request a new AdSense PIN?
According to official Google AdSense policies, you can typically request a replacement PIN 3 times after the first one is sent, for a total of 4 PINs mailed to your address. You must wait at least 3 weeks between each request. If none of these arrive, you will become eligible for manual verification.
What happens if I don’t verify my address in time?
Address verification is a mandatory step to receive payments. If you do not successfully verify your address within 4 months of your first PIN being mailed, Google will stop showing ads on your website, YouTube channel, or app. This means your earnings will be paused until you complete the verification process.
The Final Delivery
The journey to getting your Google AdSense account verified in the UAE can feel like a maze, but it is not an impossible one. By understanding the unique challenges of the local postal system and taking a strategic approach, you can break the cycle of frustration.
The key takeaways are simple: ditch the street address, embrace the PO Box, and use the “secret weapon” of adding your mobile number in Address Line 2. Follow the troubleshooting steps patiently, and remember that manual verification is your guaranteed final solution if the mailer never arrives. With this playbook, you are now equipped with the knowledge and tools to get your address verified, unlock your earnings, and get back to what you do best: creating great content.
Share your own AdSense verification experience in the UAE in the comments below to help other creators in the community!
This guide is based on current Google AdSense policies and user experiences in the UAE. Google’s processes are subject to change without notice. Always refer to the official Google AdSense Help Center for the latest information.


